Showing posts with label handmade. Show all posts

Friday, March 24, 2023

Finish It Friday ~ Another Runner Hat

After I finished Z's cross-country runner hat last fall, my cousin asked me to make one for her, so I picked up a skein of the same soft, squishy yarn in a sunny color called saffron, and got to work. 

I wanted to make this second hat smaller than Z's, which is pretty large and loose, so I went down a needle size, from 7/8 (ribbing/pattern) to 6/7, shortened the ribbing so it wouldn't be foldable, and focused on keeping my tension consistent throughout.


Unfortunately, I also accidentally cast on 80 stitches rather than the 88 (or 90) I should have, and the hat turned out VERY snug. So I started again, with the correct number of stitches, and came out with two hats, one a form-fitting adult size and one just right for a kid.


I gave the small one to a friend who still has little ones in her home and sent the other one off to my cousin, with hopes for some cold weather remaining in the winter so she could wear it.


Ravelry notes (including an explanation of the cast-on conundrum) here. Ravelry notes on the original hat with the pattern here (including notes on how to lop off the Ancient-Egyptian-looking hands and an improved decrease over the first one I did).

Friday, December 9, 2022

Finish It Friday ~ Cookie Monster Skirt

Although as an adult I identify most strongly with Oscar the Grouch, due to my penchant for a certain fuzzy lime green fleece vest, a period in college when I spent time digging through the trash (as part of a study of solid waste, mind you), and my general personality, when I was very small, I went through a Cookie Monster phase, wherein I had a stuffed Cookie Monster that rattled when you shook it and a pair of Cookie Monster footie pajamas that I loved because not only was there an image of the monster embroidered on the chest, but they were made of fabric with extra long, nappy blue fuzz. Also, of course, me like cookies.

So when I was tidying up in the basement last week in an effort to access our holiday decorations and ran across a length of midnight blue fabric with a thick, fuzzy pile on one side and a soft fleece on the other, I knew I needed to revisit my Cookie Monster days, but with a cozy skirt instead of pajamas. I followed the same general method I used for these and these fleece skirts that I made a couple of years ago; that is, I started with a pattern and then went off on my own tangent.

For this one, I made a yoga-style waistband, because the blue wasn't long enough for a skirt in and of itself, and because then I didn't have to mess with elastic. I was paranoid about making the waistband too tight and ended up leaving it too loose, which I think is the exact same mistake I made last time. I did not give it pockets, either, but I can add one later if I decide it needs one. I also flat-felled the side seems, which, together with the waistband, which appears the same on both sides, makes the skirt basically reversible, if I ever want the soft fleece on the outside and the pile on the inside, except that the hem will be rather obvious inside-out (but who cares?).

I forgot what a fast, satisfying project these skirts are, so I think, in the interest of clearing out some more basement clutter, I'll zip out a few more.

Friday, October 28, 2022

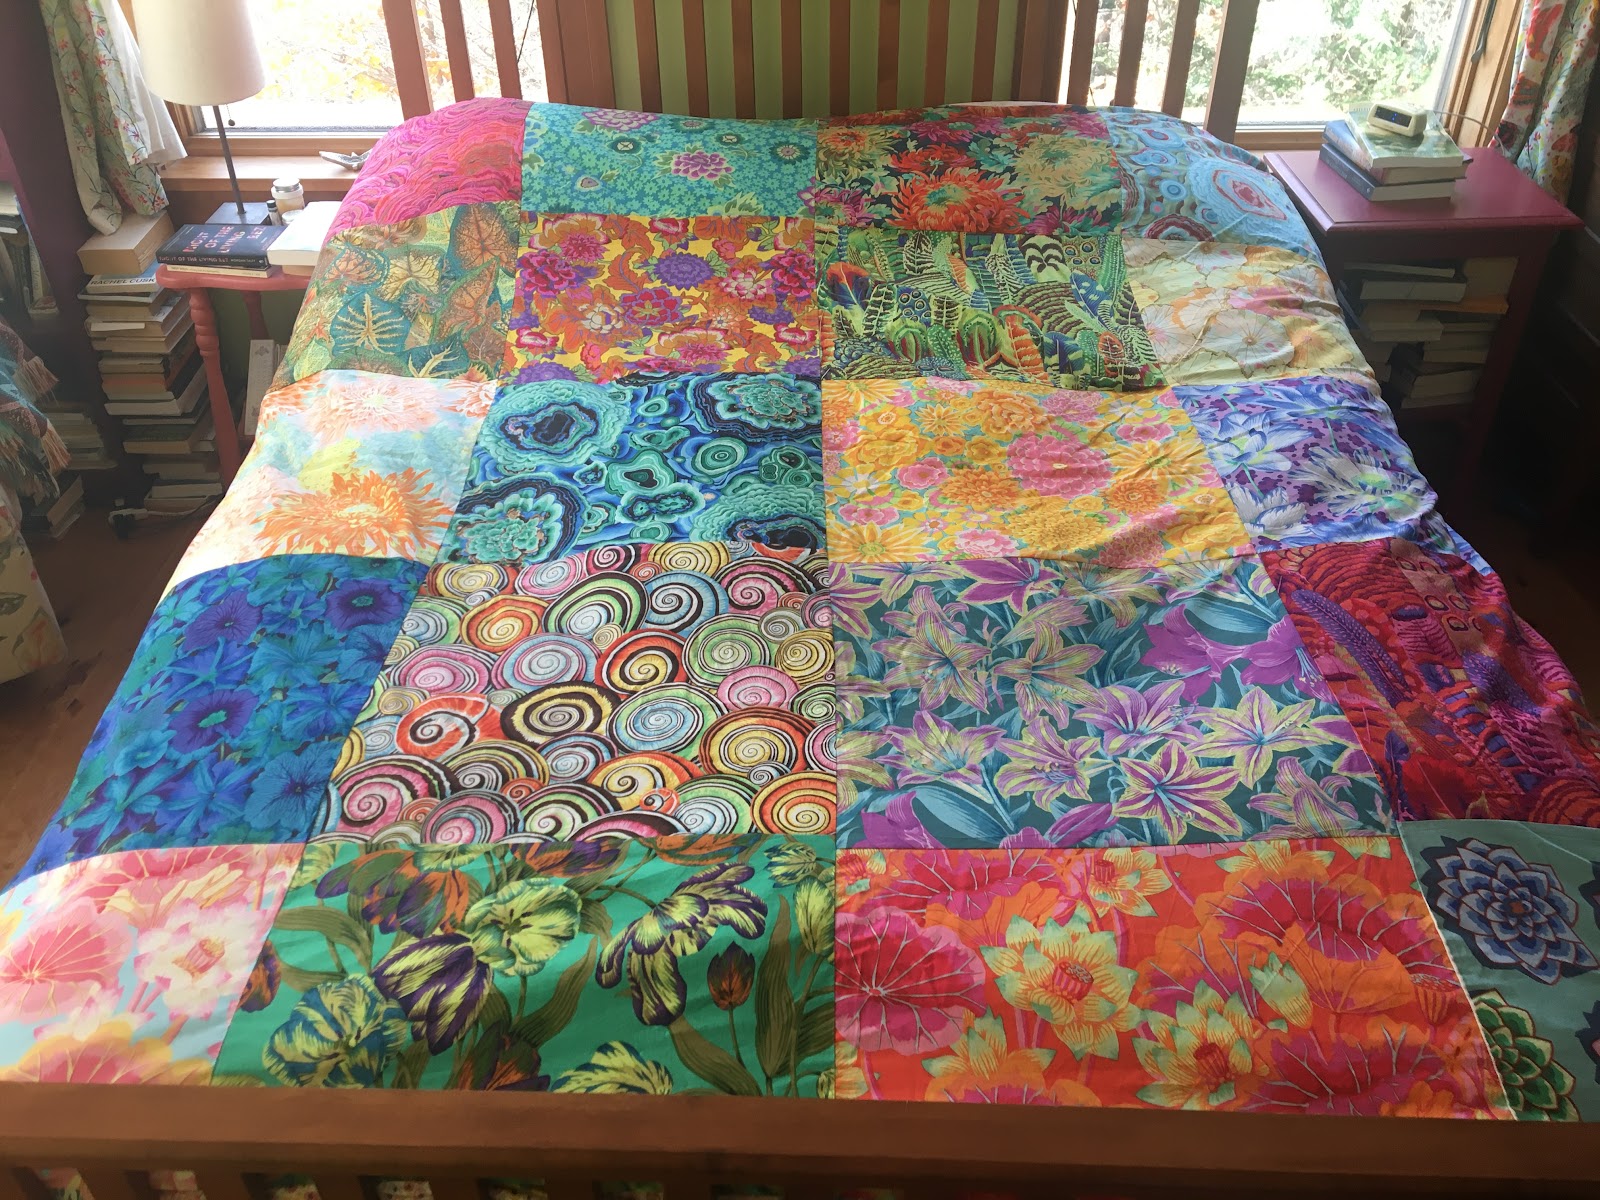
Finish It Friday ~ New Duvet

Since about mid-July, C has been begging me to put the down comforter back on the bed. At any temperature below 70 degrees, a quilt and two blankets just isn't enough for him. But, in addition to not wanting to be roasted alive, I enjoy having the summer quilt on the bed--it even inspires me to make my bed (almost) every morning. Besides, our old duvet had become threadbare, with the fabric eroding to tickly fringe all along the top edge. And no wonder--I made that one thirteen years ago!

I'd been meaning to replace the old duvet, which I'd made by piecing together fat quarters, for a while, but one of the fabric stores near me never reopened to in-person shopping after the pandemic, and the other one moved to a location farther away and changed focus to long-arm quilting, cutting way back on fabric inventory, so I hadn't been able to amass the requisite fat quarters. I finally gave in and ordered a couple of bundles online, supplementing with a couple of additional prints I picked up on a shopping trip with my mother-in-law (to a fabric store that's both open and still selling fabric!), and last week put them together in a big rectangle.


Last time I went with a lot of pastel hues (although, looking back at that old post, it was not as pastel-ey at the beginning as it was after 13 years of sun-bleaching). This time I went with bright, bold prints. My favorites are the feathers, the turkey-tail fungus, the snail shells, and the agates. So fun!

The procedure is pretty simple: for a queen-sized duvet, piece together 20 fat quarters in four rows, five quarters high. Sew this to a full-sized sheet*, wrong-sides together, leaving an opening of about 18-24 inches along the bottom edge. Fold the raw edge of the duvet top, at this opening, over on itself and hem, reinforcing the points where the opening meets the sewed-together bits, if that makes sense.

*It took me way too long that you only need a full-, not queen-sized sheet to back a queen-sized duvet.

My goal with this project was keep it simple as possible, with minimum labor, and so I used the fat quarters as they came. Unfortunately, there ended up being a difference size between quarters of up to two inches, and I don't think there was a square corner among them, so I had to stretch and fold and fudge to get it to all fit together. To save yourself that headache, consider cutting your quarters to be all the same, exact size.

The photo above is just staged--two blankets and a quilt still lie beneath the duvet, because it's still a smidge too warm to really need a down comforter, at least until November.

Friday, September 30, 2022

Finish it Friday ~ Cross-Country Hat

This is my seventh--and last--season with a kit on the high school cross-country running team, so in classic last-minute-Andrea fashion, I decided to take this opportunity to knit a running hat for Z. 

I actually got the idea at the last meet of last year's season, when I noticed the kids from the more well-resourced/well-organized schools wore mass-produced acrylic beanies with little runners sprinting around their crowns. I'll take any excuse to do a little two-color knitting, and there happened to be a fabulous yarn store in the very town where the meet was held. I just didn't get around to starting on it until after this year's season got started. This wasn't a huge problem, since the first meets of the year are usually swelteringly hot, and it's not till the last few that the cold breath or winter breathes down the runners' backs.


I couldn't find the exact pattern I wanted, so I made this one up, using a couple of other patterns as the basis and a sheet of graph paper and markers to work out the little running guys. You can see my pattern on Ravelry. They ended up with Ancient Egyptian-style hands, which is a detail I might leave out if I were to do it again. You can also see that every once in a while, where I carried my blue thread, it shows through the white. I'm sure there's a technique for avoiding that, and I'm sure I'll figure that out before I do more color work. 

Now the only question: Will Z actually wear the hat? There are only two or three meets left. But there's plenty of cold winter weather ahead, so the hat might get some use even if it never puts in an appearance at a meet.

Friday, September 2, 2022

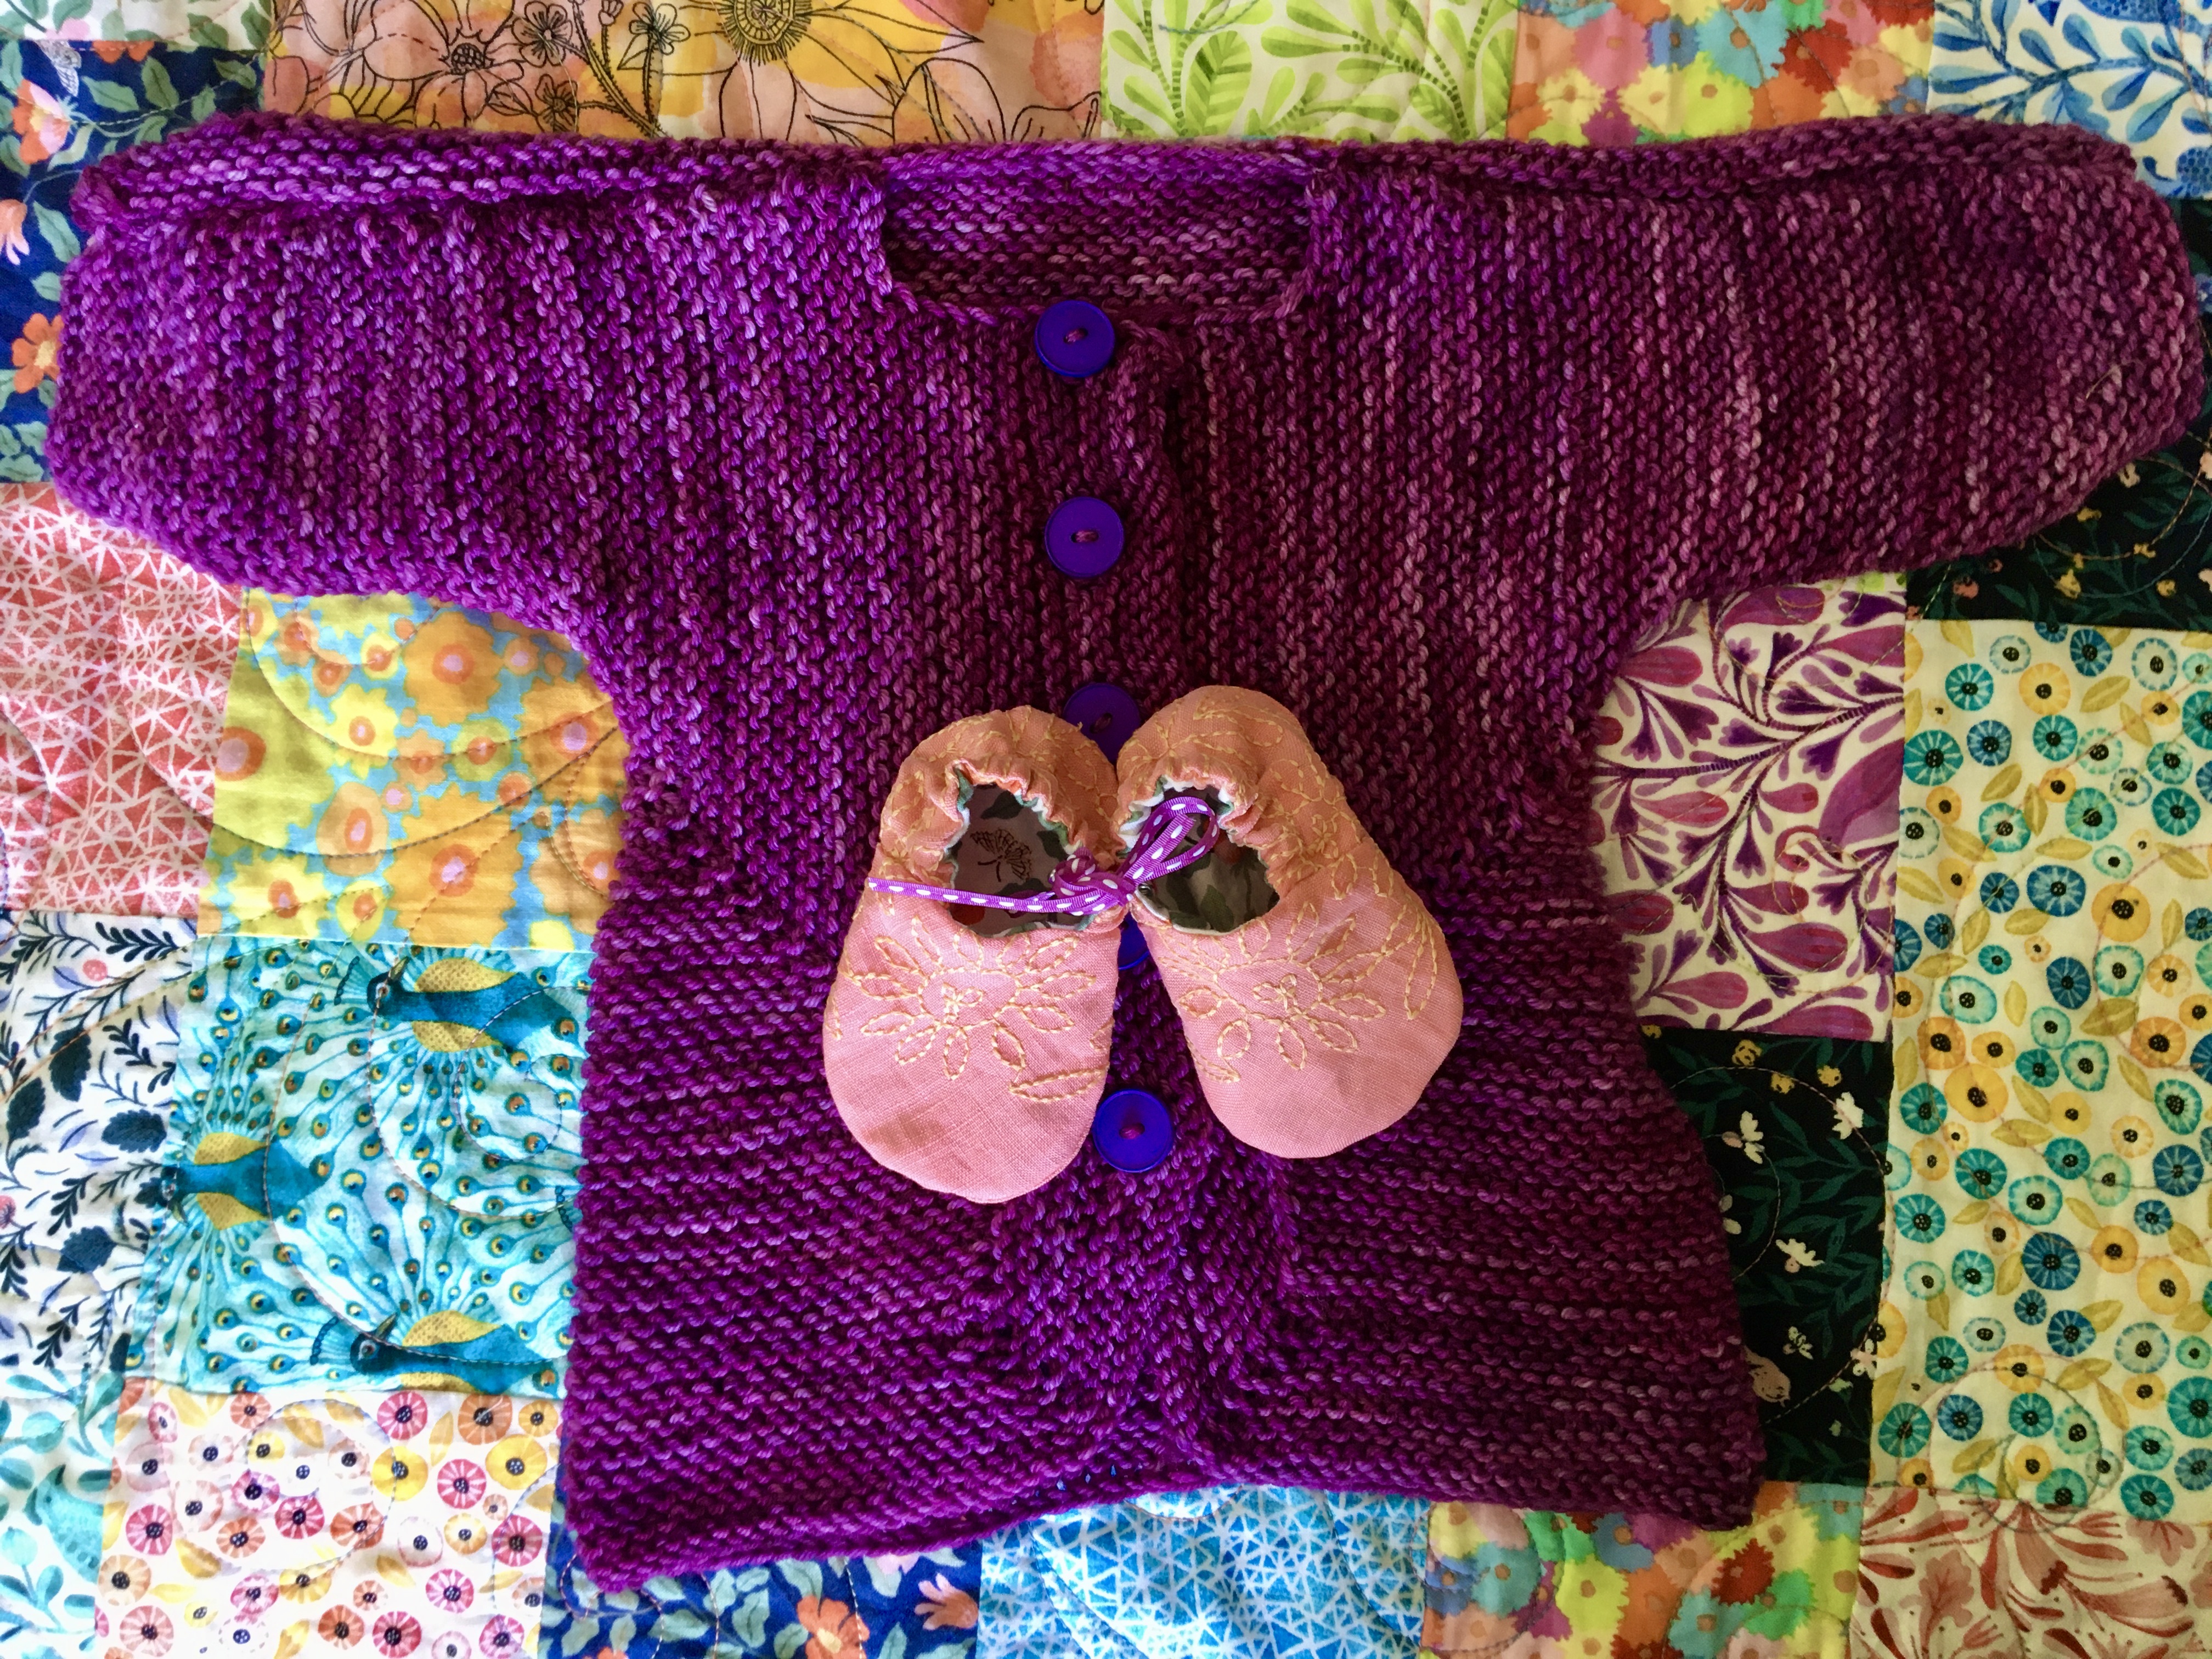
Finish It Friday ~ Tiny Shoes

My brother and his wife expecting a baby girl gave me an opportunity to try my hand at making tiny embroidered booties of the type I've always admired made by Melissa Wastney at Tiny Happy. (I have made these and these little baby shoes out of other fabric , but something about that vintage embroidery that makes me squeal.)

I started with this shirt, which, despite my not being a fan of pink, was my favorite summer top for several years, until I wore holes in the arm seams. I hung onto it, though, thinking I could repurpose the soft linen in some way. It's not exactly vintage but it is embroidered.


I cut strategically around the embroidery, found a fabric that complemented both the pink and the peachy stitching in my stash, and put a pair of reversible baby shoes together (using a tutorial that I had printed out many years ago but which, alas, is no longer online).

They came out so freaking cute, I must say (I don't have anything to show scale in the photo, but let me tell you they're tiny!)

They don't exactly match the sweater I made for the same baby, but I think that's okay, because the shoes will fit a newborn and the sweater looks like it's more for a 3-month-old or bigger baby.


Friday, August 26, 2022

Finish it Friday ~ Tiny Sweater

My knitting activity has been erratic of late. The last thing I made was an extremely long (in inches and months) poncho--a project that was supposed to last the whole pandemic, but which took much longer than I expected and still was done long before there was (or is) and end in sight to the pandemic. I've bought some yarn in the time since finishing the poncho, but I haven't felt the project mojo to get started on another project. But when my brother and his wife announced they were expecting a baby girl this fall, I knew it was my chance to do something I never had time or energy for when I was expecting babies of my own--knit a baby sweater. 

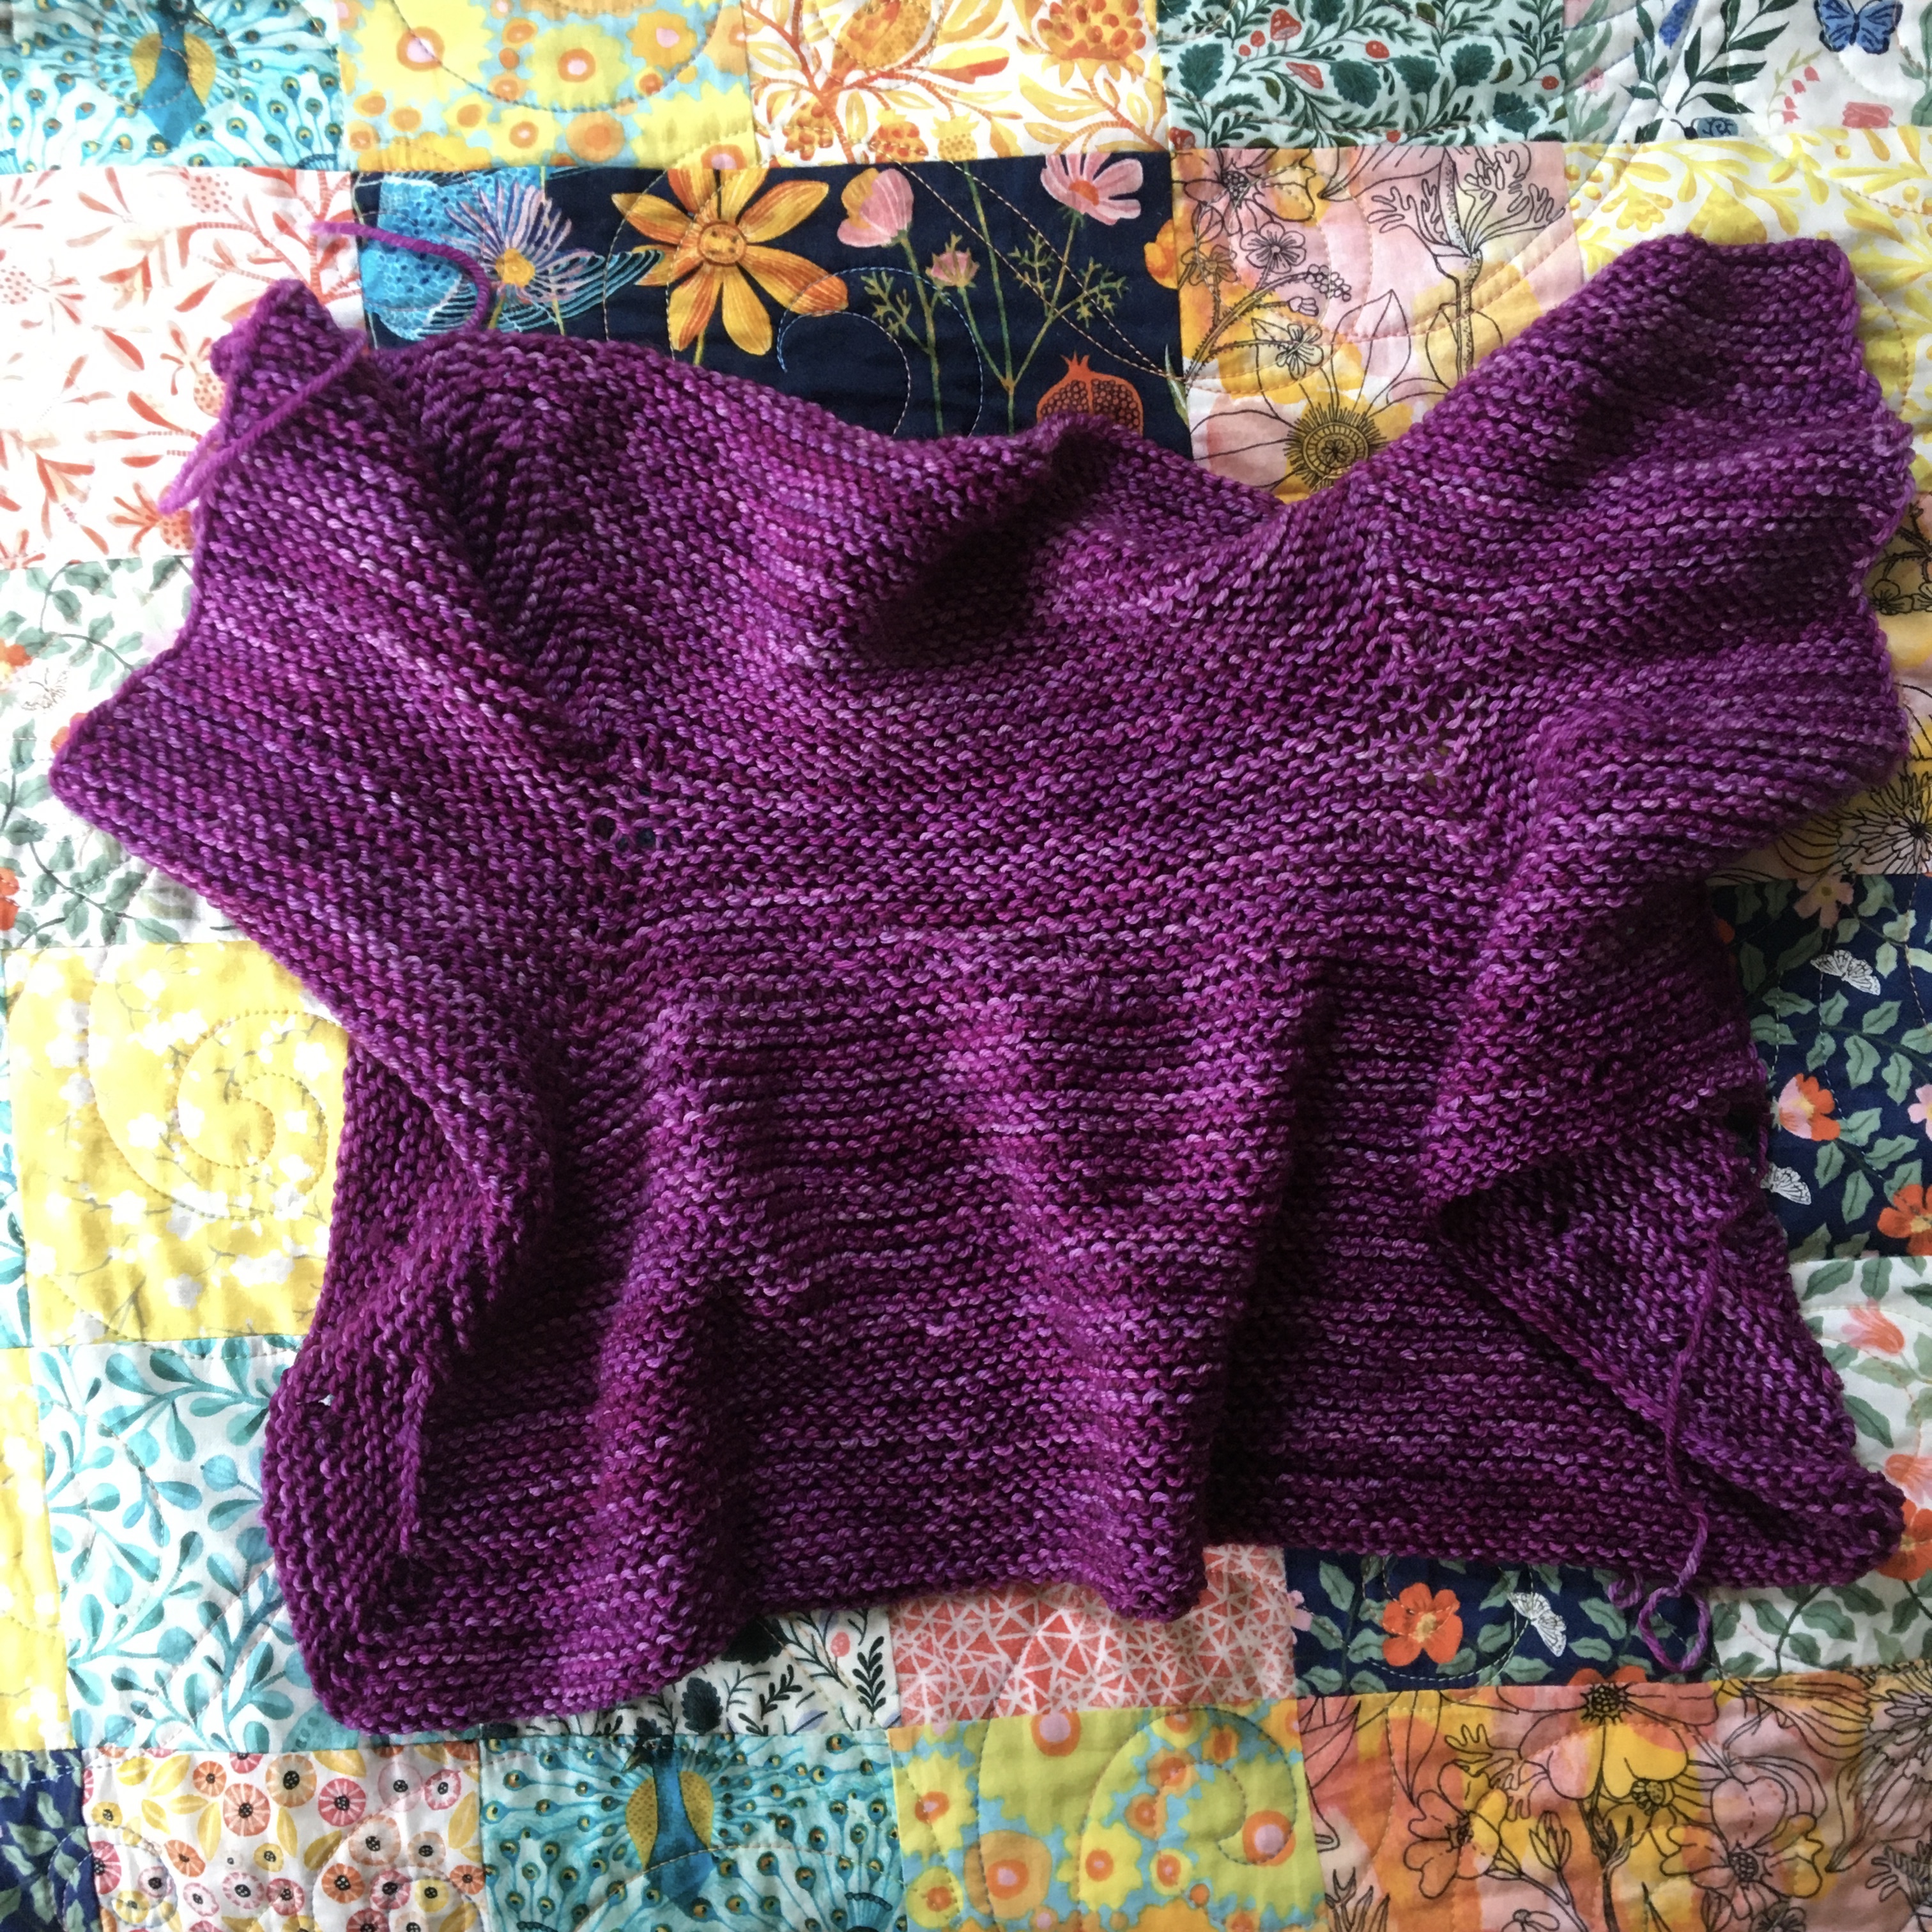
And I knew I wanted to knit Elizabeth Zimmerman's Baby Surprise Jacket, which is made all in one piece, a piece that looks like a weird and wobbly blanket, but which magically folds up into a cute little sweater. I started out with another yarn, a pinkier shade of raspberry, but a finer gauge and a fussy/splitty fiber that was not doing it for me, so I returned to the knitting store for this lovely, soft Malabrigo in a heftier weight (which meant fewer stitches per row, always a plus).

The directions were a little...vague (or, as the updated version of the directions say, "sparse") and leave a lot up to the knitter's knowledge, experience, and personal preference. But ultimately I only referred to the updated directions occasionally to confirm that I'd interpreted the originals correctly. I also enjoyed the humor in EZ's ("Hope you are still with me" when the pattern got very strange, and "The baby will probably be unmoved by this offering, but the parents may well be charmed, and your friends will be amazed."). Really, once I figured out how to tell where my increase/decrease spot was (and gave up being skeptical about the whole thing), it was pretty easy. 


I'd bought some cute little pink flowers for buttons, but they turned out too small for the buttonholes, so I fished these purple ones out of the button jar, hoping they'd give a "whimsical" not "Welch's" vibe.


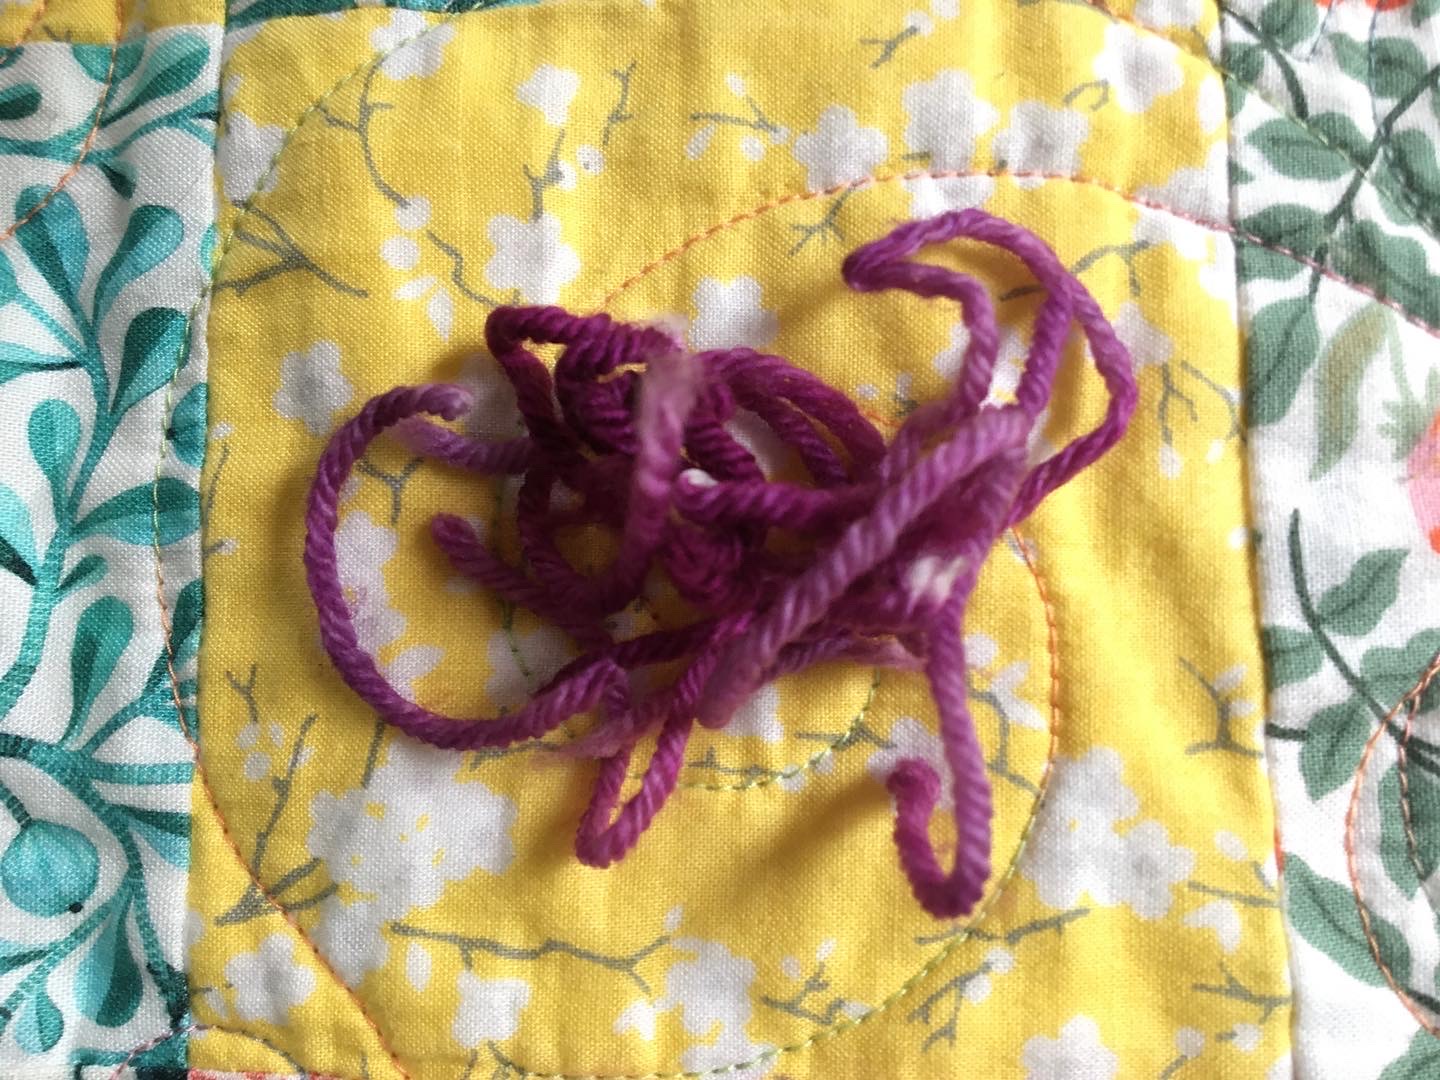
And, wonder of wonders, even though the salesperson at the yarn store insisted I buy two skeins, I finished the sweater with about six inches of yarn to spare.


Ravelry notes here.

Friday, April 1, 2022

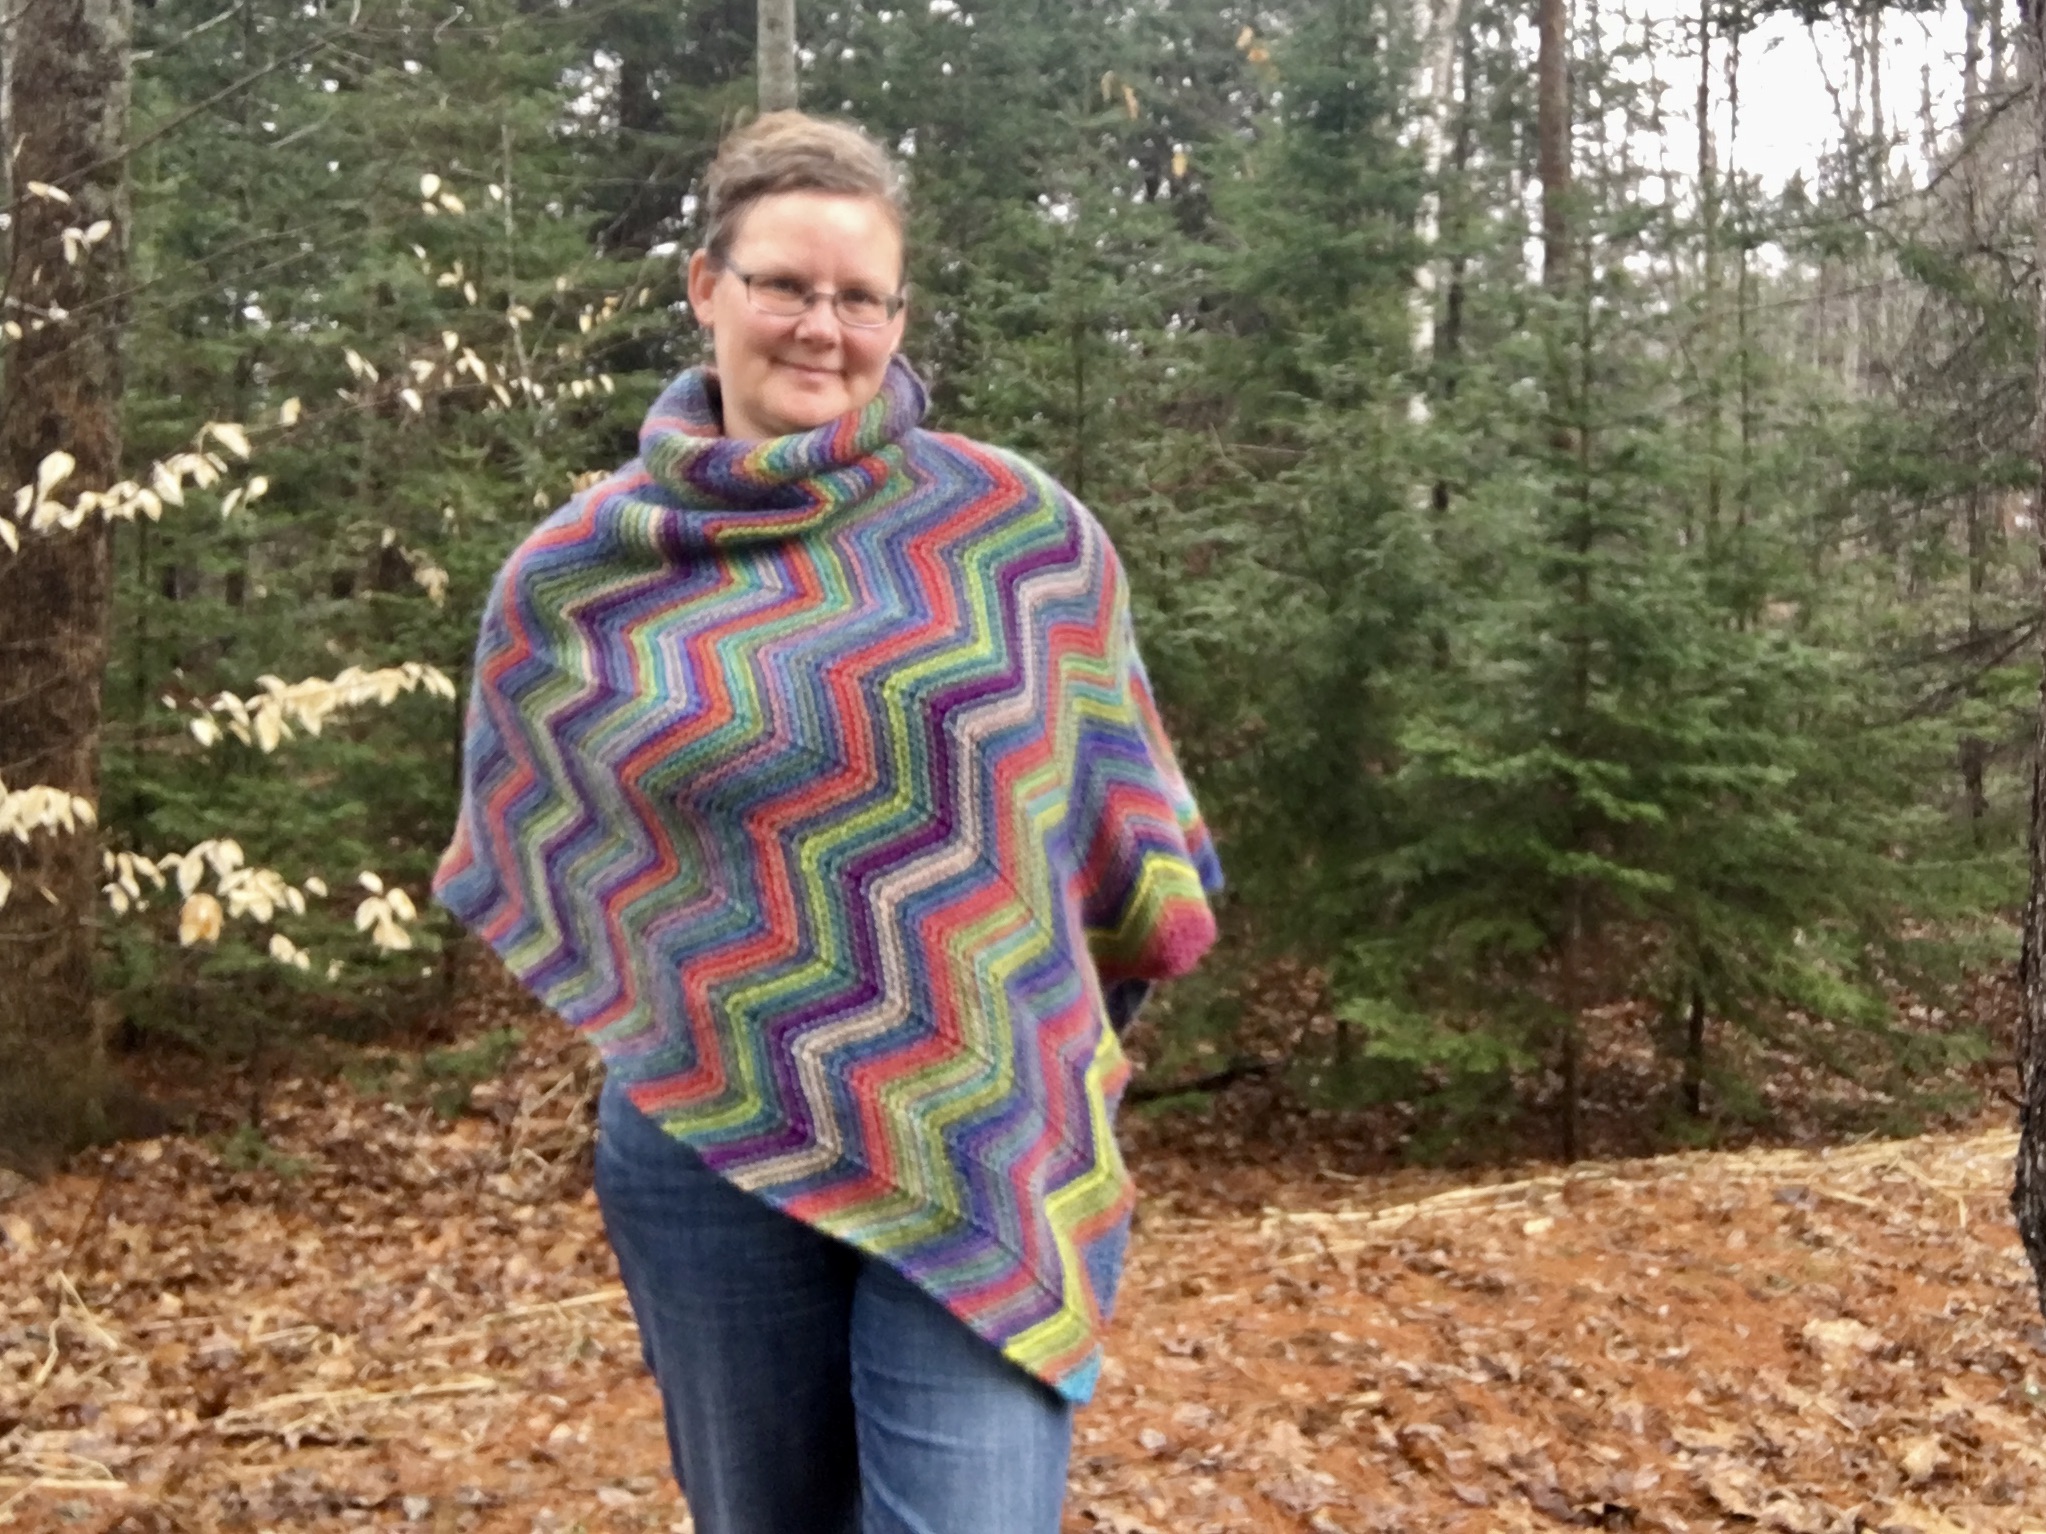
Finish it Friday ~ Pandemic Poncho

Not long after everything shut down in 2020, I started knitting this endless poncho from yarn I happened to buy, with no particular plan, when I ordered the yarn to finish C's vest. I'd enjoyed knitting, and wearing, the last poncho I'd made, I wanted to make another, and I found this fun pattern on Ravelry.


It's about 8 miles (okay, 80 inches, but who's counting) of zigzagging garter stitch, and it started to feel very Like Water for Chocolate-esque after a while. It represents many, many hours of binge-watching TV shows. After about a year of knitting, I took a long break, picking it up a few months later and again stopping when I was stymied about how to finish it. The problem was I could not figure out if the two halves were the same length or not due to the zigzags. (The whole thing is a kind of T shape, with a very short stem that makes up the cowl neck and a very long, fat crosspiece, that gets folded in half and stitched together.) Finally, after talking to a nice lady at a yarn store (wearing a fabulous, floor-length hand-knit dress), I figured out that I could mattress-stitch the seam together, starting from the neck, and work my way to the unfinished end, and either add or subtract rows as needed. (I still ended up adding rows, then ripping them out, because I forgot that the zig shouldn't line up with the zag.) After all that, I just needed to weave in about 16 trillion ends, and voila! The endless pandemic poncho is complete. If only the endless pandemic would wrap up as well.


Ravelry notes, cursory as always, are here

Friday, October 29, 2021

Finish it Friday ~ Little Bird Embroideries


My word for 2021 is "finish," and I started the year with a list of 21 things I wanted to, you know, finish. Some big, some small, some totally unreasonable. One that fell into the smallish department, both in terms of physical size and in effort to get done was this set of seasonal bird embroideries. I have a tendency to buy, or ask for as gifts, craft kits (usually some kind of stitchery that I don't normally do) that look super cute, and then never getting around to executing them. 

This embroidery kit from Cozy Blue Handmade was a Christmas present from a year or two ago (and if you look at her website, you too will be overcome with desire for one of these kits!). I'd started a couple of them (during the corresponding season, of course), but had lots of excuses for not getting them done--it's harder to embroider while watching TV than to knit; I couldn't see to stitch because we had poor lighting; I couldn't see to stitch because I needed new glasses. I resolved the latter two issues with new glasses and better lighting, and I just got over myself and worked on them while watching TV. Most of what we watch is dumb and doesn't require full attention (though I think I missed an important clue when embroidering while watching Only Murders in the Building). And I finished! 

And checked another item off my list. I'm up to ten, which is dangerously far from 21 with only two months left in the year, but it's ten more items than were done at the beginning of the year, so I'll call it a win for now.

As for the embroideries, I hang the seasonally appropriate one on a panel of wood separating our south-facing living room windows, which looks cute and festive.


Friday, May 21, 2021

Finish it Friday ~ Bedroom Curtains

I didn't really set out to give my bedroom a facelift, but things kind of snowballed from a sewing a quilt to painting furniture to making curtains, the previous set of which had gotten faded and tattered since I made them ten years ago, last time I gave my room a total overhaul


This fabric is Anna Maria Horner's Hindsight "sinister swarm" moth print. Because I bought it online, I had no idea how big the moths would be. They're enormous! But perfect for curtains. And, as you can see, they're carrying on that surprising salmon theme I mentioned last week.


I also did a major cleanup of book and sewing clutter (though not having reached any real storage solutions--there are boxes of books and magazines, temporarily, in the closet, and the bin of fabric I usually keep close at hand has moved to the basement. I'm hoping this will make the space more conducive to other activities--like yoga, reading, and writing. I'm just waiting on a comfy chair I ordered like a million years ago to show up, which will make this the coziest reading/writing nook. I'd also like to repaint--not a new color but a fresh coat--but that will have to wait till I have more time on my hands. And I'm still contemplating artwork. I think my way of celebrating vaccination will be to visit art shows and galleries this summer.

Friday, March 19, 2021

Finish it Friday ~ Little Bird Embroidery

This isn't much, but I'm all for celebrating small wins this week. Several years ago C gave me an embroidery kit for Christmas (because I asked for it) by Cozy Blue Handmade. It has four patterns--all of the same image of plants and birds but in a different color scheme for each season. They're totally adorable, but the thing is, I don't really like following patterns or instructions (except while knitting). Also, it's harder to embroider while watching TV and the lighting in our house wasn't that great. Which is to say I hadn't gotten very far over three or four or five years since I got them.

This winter, I bought new lamps to make working and reading in the evening easier and more comfortable. And I found that if I'm watching something sort of mindless, embroidery and TV aren't totally incompatible. And so I finished the first of the four seasons: winter cardinals (which, truth be told, was the one I'd made the most progress on in the past, so it really is a small win, but still a win).


While I had my embroidery box out, I tidied it up, winding all of the floss onto little cards. (I don't have a "before" photo, but picture a packrat's nest.) This was a useful activity for keeping the hands busy during interminable conference calls when knitting might be a little too obvious.


Also in the embroidery box was this little scene I stitched up a few years ago on a weekend trip to the pond. This is more my kind of embroidery. It might not be as professional-looking as the kit, but it was more fun and personal. I have to think of what to do with it, though.


I also found these embroideries from drawings M made when he was very little: a smiling, happy elephant and turtle and a very long, winding snake (which, apparently, was my Waterloo on this project). 


I don't remember what I planned to do with these and I don't know what I should do with them now, if anything. I could dig out my kids' old drawings and do a whole series, put them together in a wall quilt or something. But I'm not sure I could handle it. They are so far from the cute little kids who drew cute little animals (and, if I recall correctly, I had to really dig to find these little animals--M mostly drew robots and space and war scenes).

Friday, February 26, 2021

Finish it Friday ~ Wavy Charms Quilt

This quilt began as a package of vaguely S-shaped charms my mom sent me several years ago as part of a de-stashing effort. I never got around to finishing it because: a) I didn't have enough charms for a whole quilt; b) I didn't have the original pattern piece to make new ones out of (nor nearly enough stash); and c) I had no idea how to sew wavy lines and get the resulting fabric to lie flat.


I decided to just let all that go and dive in. I made a pattern from one of the pieces my mom sent--this is a good way to introduce error, and indeed the new pieces I cut ended up longer than the others, but like the guys of the buildings and grounds crew where I worked the summer after I graduated from college used to say whenever someone started to get uptight about the imperfection of a small project, "It's not a f-ing piano." I'm not sure if I sewed the curved edges "properly," but I just kind of stretched and molded one piece to fit another and, when the two pieces were being recalcitrant, by using the occasional pin.


For the backing, I went with a romantic rose print, which I thought fit with the calicos on the front. I didn't like it at first and wished I'd gone with something more simple and monochromatic, since the front is so busy, but it's growing on me. Like the 70s quilt, I used fluffy batting and tied the corners, old-school style.


Even though almost no two of these prints would go together in any rational way, they kind of work as a big kaleidoscope of color.

Friday, February 19, 2021

Finish it Friday ~ That 70s Quilt

The first quilt top from this post, the one my mom started way-back-when and then passed on to me still not-quite-as-way-back-but-still-pretty-far is done! And don't you love the way the alternating rectangles and triangles make that cool diagonal pattern?

Since my mom got the original pattern idea from a movie about poverty and tragedy (she still doesn't remember which, but I still think it was along the lines of Coal Miner's Daughter or The Dollmaker), it wouldn't have been right to pay a hundred bucks to have it professionally quilted. And besides, tying is more appropriate to the 70s aesthetic. So is puffy polyester batting, which is all my quilt lady had in stock when I finally made it to her shop--she's moved way out to the boondocks (boondocks that are far away from the boondocks where I live), and she's downsized, becoming more of a longarm quilting service than a fabric store, which makes me no end of sad. But she did give me the idea of turning the quilt, which saved me the hassle of making and sewing on binding.

The purple part of the backing is a length of fabric I bought at our local department store--Reny's--way back when they still carried fabric, with this project in mind. I thought it had a groovy 70s vibe. Unfortunately I didn't buy enough for the whole quilt back. At the quilt shop, I picked up some plain muslin to finish it off with, but that seemed far too dull for this particular blanket. So I dug through my stash and came up with this orange that has an almost imperceptible leaf print. I had just enough to make two strips along two edges of the purple. I spent several TV-watching sessions threading embroidery floss through each corner and the center of each block, and voila! A bright, cheerful, totally cozy, ecstatically retro throw for those chilly evenings in front of the TV (yeah, a lot of TV happening these days).

Wednesday, February 10, 2021

Dollhouse Updates ~ Tiny Carpentry Projects

I thought I was done with the dollhouse, but every once in a while, I get something in my head that it absolutely *needs* and I don't rest until I've made it come to pass. One thing I planned to add all along, was a desktop tablet--everything the writer/artist living in the house would need for creation. I had this piece of lucite-like material in a desk shape (something my dad brought home from work a good 40 years ago for me to use in this very dollhouse). It makes for an ultra-modern workspace. 


I honored that aesthetic with a lamp made of two buttons and a thin plastic tube (found in my "box of random things that might come in handy some day") and added a blotter (I don't really know what purpose a blotter serves, but I've always wanted one), a set of watercolors (piece of popsicle stick, painted) with a brush (toothpick) and a water jar (bead), a pencil (toothpick again), and a small book (paper, folded and sewn). A spool stool and a groovy rug make this corner of the attic bedroom the coziest little workspace.

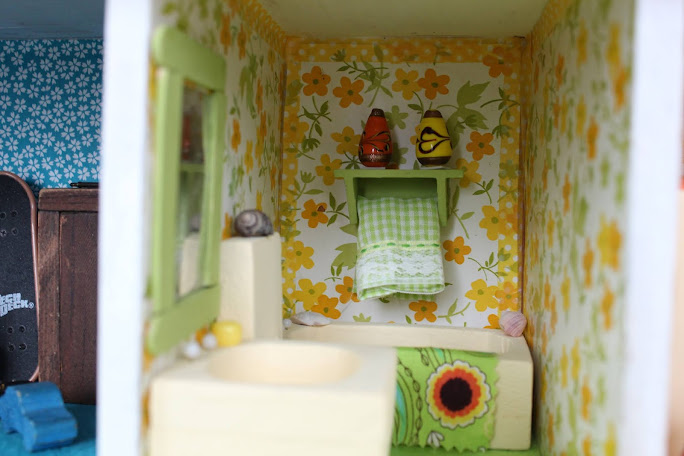
For the other projects I've wanted to complete, I've had to take up carpentry--very tiny carpentry. First I gave the bathroom mirror (a piece of shiny silver paper that I'd added when the boys were little) a popsicle stick frame. Then, using some little plywood pieces (also from the "box of random things that might come in handy some day") and a toothpick, I built a shelf with towel bar for the wall over the tub. A fancy towel, groovy bathmat, and pair of shampoo bottles (glass beads), along with some seashells (every bathroom needs seashells so that bathing feels like a trip to the beach) and a cup (bead), finish the room.


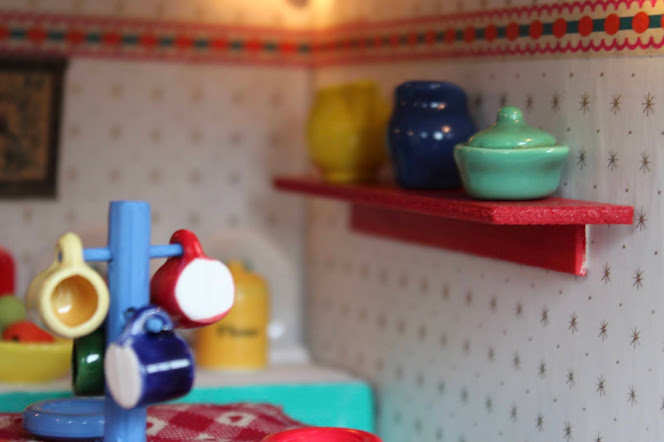
My Fiesta ware-like dish collection continues to grow, and so the kitchen needed some more storage space (just like my kitchen in real life). So I built a little wall shelf (more little pieces of plywood and a popsicle stick) to go over the table.


A set of colorful mugs necessitated a mug tree (chop stick, toothpick, and button).


Here's how the kitchen looks in its current state:


Finally (but not really finally), another problem that corresponds to one of my own: the growing book collection necessitated a bookcase. I made this one with more pieces of plywood--they have an angle at one end, and I made use of this to create a dictionary-stand-type bookshelf--and a toothpick (to keep the books from sliding off the top).


I didn't think about the books being mostly dark green when I decided to paint it that color, but I think it works okay. (The books here are field guides to wildflowers, birds, and moths/butterflies, Pride and Prejudice, plus two "dummy" books that look old; in other parts of the house are Winnie the Pooh, The Night Before Christmas, a dictionary, and the Better Homes and Gardens New Cookbook--see the kitchen photos--which is a pretty good collection of essential books, if you ask me.)

Friday, January 29, 2021

Finish it Friday ~ Two Quilt Tops

Over the past year, thanks to the pandemic, I’ve dealt with a lot of deferred maintenance, big (like repainting the exterior trim on our house) and small (like repairing my favorite bracelet). It felt good to get these nagging tasks off my list, so I decided to make my word, and theme, for 2021 “finish,” and I wrote a list of 21 things that I’ve either started and left hanging or have been meaning to get around to doing—from writing projects to reading lists to crafts. Enter these two throw quilts, both of which started with my mom and have been sitting in my to-do pile a very long time.

The first is this retro number that my mom must have started in the very early 80s, and passed on to me, partially assembled at least 20 years ago. I finished putting it together way back then—mostly. I was short a couple of rectangles and had assembled on block backwards. It was the work of less than an hour to take apart the bad block, cut a few rectangles, and finish it already.

Many of the fabrics in the quilt I recognize from dresses my mom made me when I was little.

Others predate me, but are seriously groovy.

The alternating blocks of rectangles and triangles makes a neat diagonal pattern overall. I recall my mOm telling me got the pattern idea from a quilt in a movie—something tragic like Coal Miner’s Daughter or The Dollmaker.


The second quilt project also came from my mom—she cut out a zillion “wavy charms” during a destashing episode a number of years ago and sent them to various quilters in the family. Two things stymied me on this one—there weren’t enough pieces for a whole quilt, and I wasn’t sure how to sew together the wavy edges of the charms. I solved the first problem by letting a lot of years and my own stash build up, and the second by just diving in with sewing.


A little stretching here and a pin or two there, and it worked out fine. This quilt was a walk down memory lane, too, with fabrics that go back at least to my first communion dress (tiny strawberries on a white background). In putting these very disparate prints together, I mainly focused on alternating light and dark, warm and cool, floral and geometric, older and newer, since there was otherwise no rhyme or reason to them. And though you’d never choose any of these fabrics to “go” together, I like the overall effect. 

Wednesday, December 2, 2020

Dollhouse Renovation ~ Part II, The Living Room

After I finished remodeling the dollhouse kitchen, my friend Libby commented that it was a "very Andrea kitchen." The living room on the other hand, is not very me, covered with pink rose-patterned wallpaper. But I didn't want to replace the wallpaper--it's in pretty good shape, and it has sentimental value (it is very my grandma), and even though it's nothing I would ever dream of living with in my house, I like it. In fact, I decided to lean in on the late 70s / early 80s Hollie Hobby, Little House on the Prairie, Jessica McClintock aesthetic and go full-on "olden days" revival. 

Before:


I replaced the carpet (which had been originally magenta, and then dark green in the early 2000s remodel) with a deep rose color. The felt-covered couch and chair that my grandparents made had gotten moth-eaten in our basement over the last several years, so I had to reupholster, which was a lot more challenging than it looks (maybe because I was doing it at the kitchen table while my family was cooking Thanksgiving dinner all around me). I stuck with the original colors of green and yellow, and for both the furniture and the carpet, I used bamboo felt, hopefully not delicious to moths but with a nicer look and feel than acrylic.


None of the other original living room furniture survived to today, so C helped me make some new pieces. A coffee table, complete with a National Geographic magazine (with actual readable articles inside) and a bird book I made with a kestrel postage stamp and cutouts of birds from a bird seed bag (every house must have a bird field guide).


One of those tall, spindly tables that people used to put potted ferns on but that would never survive in my house. I made it from a wooded spool that the heavy-duty thread I sew outdoor gear from comes on and a circle of wood C cut for me. On top, a lace coaster I had lying around and a little jug of blossoms snipped from a dried flower arrangement.


The original house did not have a fireplace. We lived in the suburbs and my grandparents had left woodturning behind on their respective farms decades earlier. But now that the house is in Maine, it needed a fireplace, mostly because a mantel is a handy place to display things. A friend of mine gave me a baggie of miniatures she had collected over the years but didn't want anymore. Among them were the Nat Geo mag from above, this tiny photo frame for which I made teeny silhouettes, and a mini bud vase. The original paper rose had faded with time, so I made a fresh bud from crepe paper. The candles are beeswax birthday candles and the logs are oak.


I said in my previous post that I was going to use handmade/found-around-the-house items to decorate the house. But then I remembered The Rambling Rose. When I was little, the local mall, Cinderella City, boasted all the best of malls in the their heyday: escalators, fountains, Christmas trees two stories high, rising into the vaulted ceilings. A below-ground level called Cinder Alley was designed to look like a small town Main Street, with sidewalks and a black-painted "street," each storefront made to look like actual buildings. (The irony of the role of the mall in round-one, pre-Walmart decimation of actual Main Streets was lost on six-year-old me.) My favorite store in Cinder Alley was called The Rambling Rose. I don't know what its primary merchandise was--only a dim vision of  a tumult of ribbon and lace and chintz. But I do remember the jewelry case with shelves that revolved vertically, each one crowded not with diamond rings but with dollhouse miniatures. I could stand and watch those shelves cascade for hours. But I never never bought--or was given--a miniature from the case. Maybe I never asked. Maybe my parents figured that I'd lose or break it within minutes (they would not have been wrong). But whatever it was, I had almost no realistic dollhouse items, and I figure, why not indulge that inner little girl now? 

So for the living room, I bought this tiny frame, painted it gold and made a tiny watercolor from a photo I took on the Colorado Trail. It's fancy like the living room, but also very me.


I also bought two framed botanical prints to hang over the mantel--also a little Victorian and a little me.


The new art complements the original art, a print of wildflowers just barely visible on the side wall.


And finally, the finishing touches: an afghan for the couch, so you can snuggle up and read the magazine by the fire, a little dachshund, for my friend Lisa who needed a dog in the house before she could move in, and a teeny rotary phone, which is one of the only real miniatures that I had as a kid (an antique store purchase probably), with the cord and receiver long gone.

After:


Don't you want to move in there?

Related Posts Plugin for WordPress, Blogger...